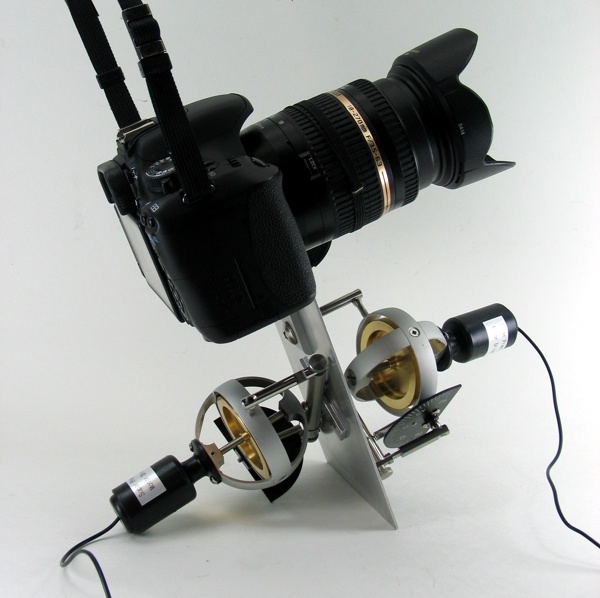
 One of my current work-related projects required me to buy some gyroscopes for prototyping. I purchased some of the beautiful, motor-driven demonstration gyros made by Glenn Turner at www.gyroscope.com.
Also as part of the project, I came across the professional-grade (and professionally priced, starting at $1,600) gyroscopic camera stabilizers made by Kenyon Laboratories. These devices don’t seem to have changed much since Kenyon’s founder filed the following two patents in the 50’s: US2811042, US2570130.
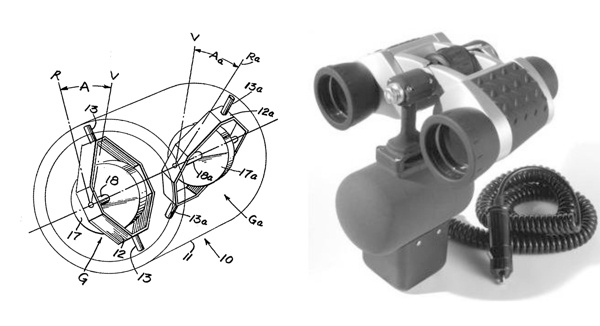
Operation of the Kenyon Labs gyroscopic camera stabilizer
Just for fun, I decided to try stabilizing my camera using the same gyro configuration described by Kenyon, but using Glenn Turner’s low-cost precision gyroscopes. Please note that I built this first device as a demo/proof-of-concept, and not as an assembly for field photography.
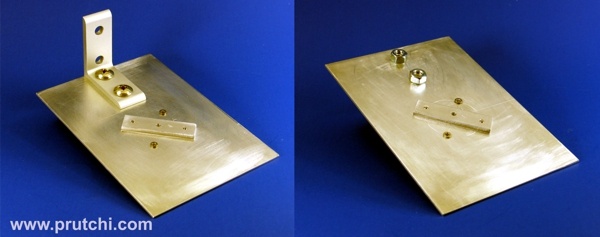
First, I built a bracket to hold the gyroscope gimbals and camera:
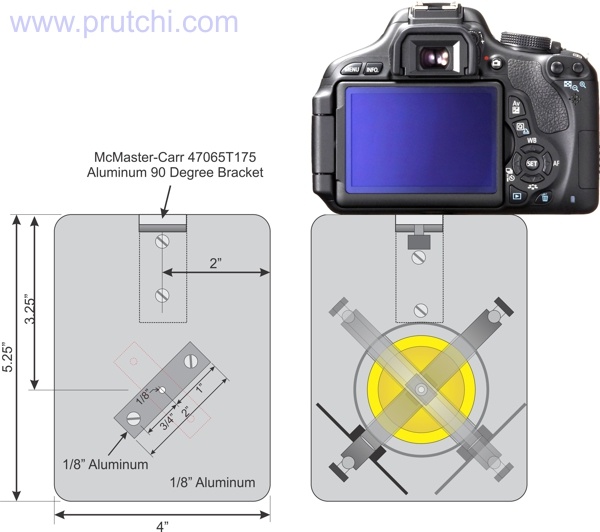
I used a sheet of aluminum to make the bracket’s main body. Two 1/8″-thick aluminum pieces 2″ x 0.54″ are screwed with flat undercut machine screws to the aluminum plate. These keep the gyroscopes in the right position by grabbing onto the groove of the center beam that is part of the gimbals mount sold by www.gyroscope.com for their Super Precision Gyroscope. The two gyroscope gimbals are mounted at 90 degrees from each other (or at 75 degrees per Kenyon’s patent) with a 3 mm (M3) machine screw.
I mounted the components of the gyroscope.com’s rate gyro kit to each gyroscope before setting them on the gimbals.
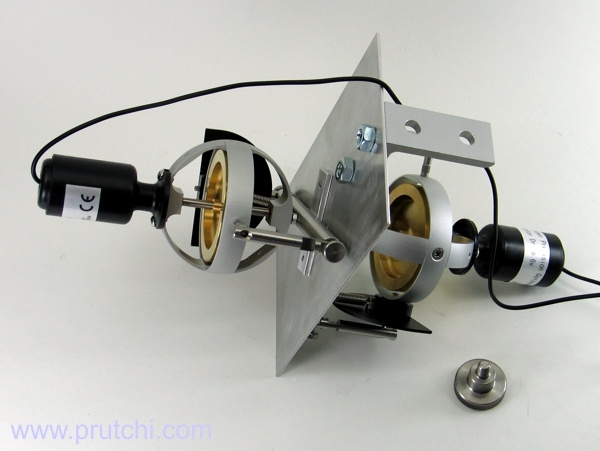
I then screwed an 80/20 aluminum bracket (McMaster 47065T175) to the aluminum plate. I mounted my camera onto the aluminum bracket using a 1/4″ thumb screw.

Following is a YouTube video showing the stabilizer in operation. I walked briskly with my camera at chest level, using two hands (worst-case condition for a gyroscope stabilizer), and not looking at the screen. A colleague checked that I held the camera equally in both runs. The lens’ own stabilizer was off.
I shot this video under worst-case field conditions, and didn’t try to pretty it up. I would expect that using a pivoted top handle will greatly improve the performance. I’ll post some more videos after I try it under some other conditions. I’m excited because even in this age of stabilized lenses, I could do with some extra help when photographing from boats and jeep caravans. In addition, my ultra-wide-angle lens is not image-stabilized.
The following video from a Kenyon Labs stabilizer user shows what can be achieved with a professional version of the stabilizer:
One last important word… I built this unit for fun because I had the components available. It makes an excellent demonstration unit. However, if you need a stabilizer to do serious photography work, then you may want to keep on checking with Glenn (www.gyroscope.com) because I know that he has a low-cost camera stabilizer gyro in the works.
Update March 12, 2012: I just received an e-mail from Glenn Turner, the developer of the demo gyros that I use. He told me that gyroscopic camera stabilizer that he will release on the market in a few months will have around 4 times more torque and will be properly encased. He will soon add some pictures and video clips to the product webpage at: https://www.gyroscope.com/d.asp?product=GYROSTABILIZER
Please visit www.diyPhysics.com and www.prutchi.com for other cutting-edge d.i.y. projects, and remember to check out our new d.i.y. Quantum Physics book:

I can’t see the difference, when Im honest. It makes it only a bit non-worse 😉
Thanks Darian,
I was testing it under worst-case conditions. Placing the camera on a handle mount (so that it won’t be rigidly constrained by my hand) made a HUGE difference. I’ll try to upload some videos.
However, this hack is trully for demo of how a gyro stabilizer works. I spoke with Glenn Turner (www.gyroscope.com) this morning, and he told me that his camera stabilizer gyro will have four times the torque, be completely encased, and should be out in the market in a few months.
Cheers,
David